Appearance
Payment Reminders Add-on Setup (Version 2) on Windows
This guide provides step-by-step instructions to set up the Payment Reminders Add-on (Version 2) for Busy Accounting Software on your Windows PC. With this setup, you can automate payment reminders via the BMS portal, using customer information directly from Busy.
Version 2 Highlights
As of Version 2, the setup process has been simplified:
- No need to manually create folders.
- No Command Prompt commands required.
- Automatic startup and configuration.
Step 1: Download and Install the Add-on
Option 1: Using Link
- Download the add-on setup file by clicking the following link:
Download Add-on Setup
To download the BusyNotify.zip file from the provided URL using a command in Windows, you can use curl or powershell. Here's how to do it:
Option 2: Using curl (Requires Windows 10 or later with curl installed)
cmd
curl -o "%USERPROFILE%\Desktop\BusyNotify.zip" https://api.busynotify.in/BusyNotify.zipOption 3: Using PowerShell
powershell
Invoke-WebRequest -Uri "https://api.busynotify.in/BusyNotify.zip" -OutFile "$env:USERPROFILE\Desktop\BusyNotify.zip"Steps to Execute:
A. Copy the command of your choice (curl or Invoke-WebRequest). B. Open a Command Prompt or PowerShell window. C. Paste the command and press Enter. D. The file will be downloaded to your Desktop as BusyNotify.zip.
Double-click the downloaded file to start the installation.
Follow the on-screen instructions:
- Choose Installation Folder: By default, the add-on will be installed in
C:\BusyNotify. - Click Install to proceed.
- Choose Installation Folder: By default, the add-on will be installed in
Once the installation completes, the add-on will automatically start.
Step 2: Configure Busy Connection
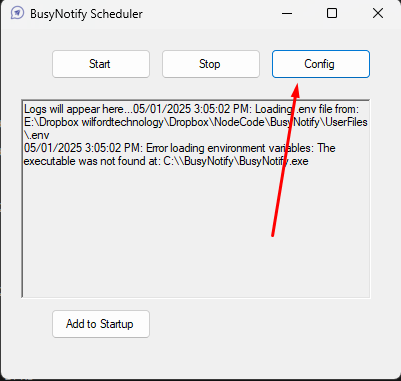
Open The BusyNotify addon and click to config button.
Configure the following details:
- Busy Software EXE location: Enter the full path to your Busy EXE file.
- Data location: Specify the directory containing your Busy data.
- BMS serverId and authToken: Retrieve these details from your BMS account.

Step 3: Instructions to Copy DLL Files to the Windows Folder
Locate Busywin Folder:
- Open File Explorer on your computer.
- Navigate to the Busywin folder where
sentrydll5.dllandBusy7.dllfiles are located. This is usually underC:\Busywinor another installation path.
Copy the DLL Files:
- In the Busywin folder, locate the files named
sentrydll5.dllandBusy7.dll. - Select both files by holding down the Ctrl key and clicking on each file.
- Right-click on one of the selected files and choose Copy from the context menu.
- In the Busywin folder, locate the files named
Navigate to Windows System Folder:
- Go back to File Explorer and open the C: drive.
- Inside the C: drive, find and open the Windows folder.
Paste the DLL Files:
- Right-click anywhere in the Windows folder and choose Paste to copy the files into this folder.
Confirm Replacement (if prompted):
- If a prompt appears asking to confirm replacing any existing files, select Replace the files in the destination to complete the process.
Step 4: Map Your Company in the BMS Portal
Log into your BMS Portal.
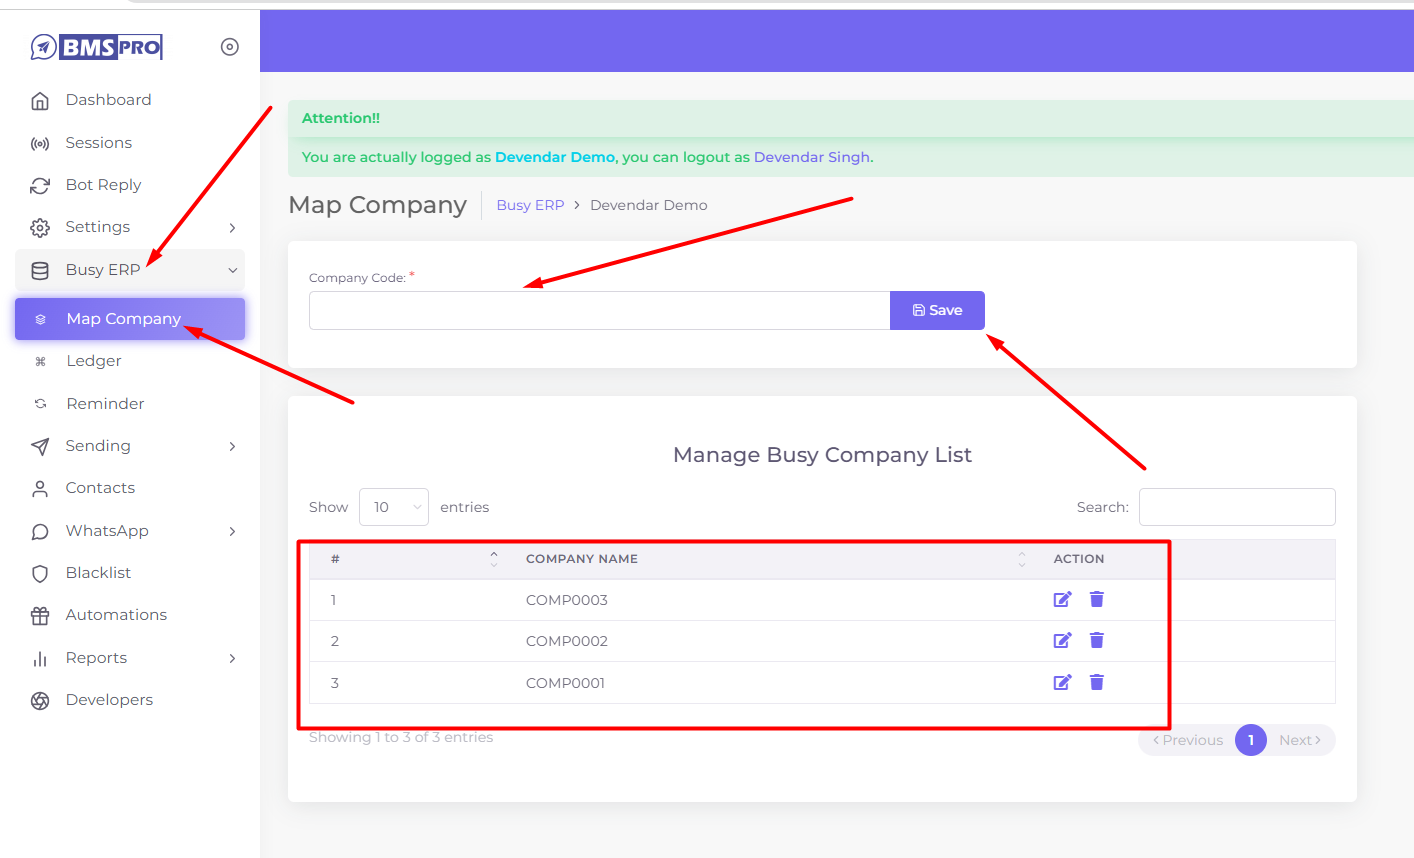
In the sidebar menu, navigate to BUSY ERP and select MAP Company.
Map your local Busy company to the online BMS company, ensuring that the same company code is used for both.

Step 5: Verify and Test the Setup
Restart your computer to ensure all services are running correctly.
Open the BMS portal and navigate to the Payment Reminders section to verify data synchronization.
Send a test reminder to ensure everything is configured properly.
Reminder Default Ledger Message.
bashDear *<Account_Name>*, Please find attached *'L E D G E R'.* Balance: *<Balance_Type> <Closing_Balance>* As in books of: *<Company_Name>.* _This reminder is system-generated._Reminder Default Ledger Message.
bashDear *<Account_Name>*, Please find attached *'BILL BY BILL'.* Balance: *<Balance_Type> <Closing_Balance>* As in books of: *<Company_Name>.* _This reminder is system-generated._
Congratulations! You have successfully installed and configured the Payment Reminders Add-on (Version 2). If you encounter any issues, please refer to the troubleshooting section in the user manual or contact support.
